The assembly of the MonsterJoysticks controller is designed to be simple and only require a simple screwdriver, this assembly guide has been broken down into simple steps with illustrations and photo to help you along the way.
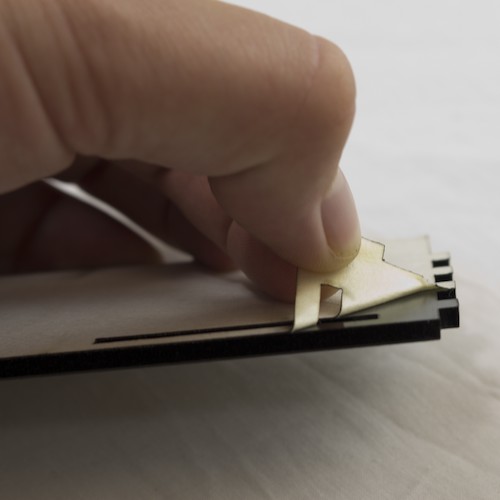
We advise to remove all of the protective covering from the pieces which have been designed to protect the high impact polystyrene during the laser cutting process.
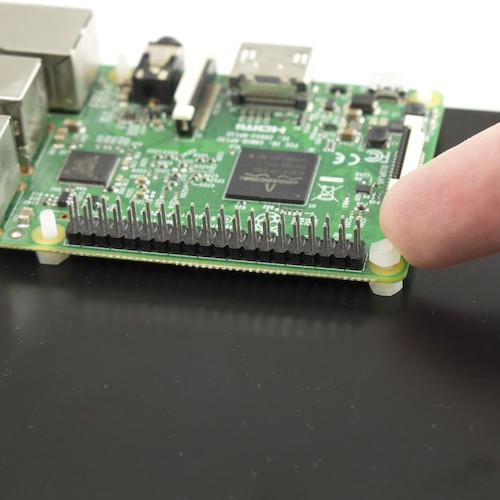
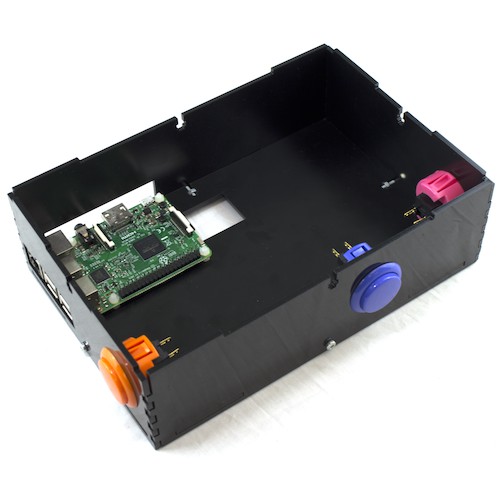
Step 1 - Attach the Raspberry Pi
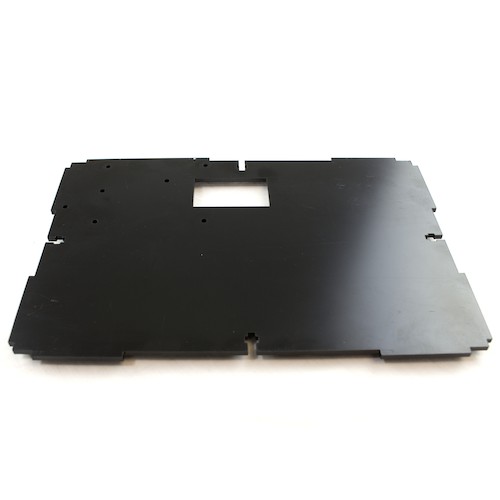
Attach your Raspberry Pi to the bottom panel of the unit, you can identify this piece using the following illustration. You will want to orientate it so that the mounting holes and access cutout are in the top left.
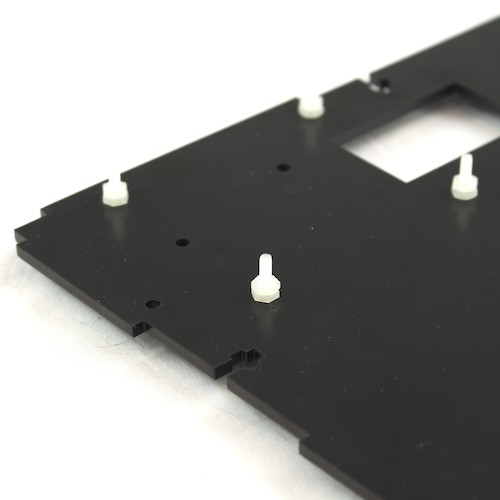
Then you will want to fasten the Raspberry pi to the bottom panel using the acrylic nuts and pan head screws provided, you will want to thread a screw from the bottom through the corresponding holes for your model of Raspberry Pi ( the zero models will only have 3 fastening points). then tighten 1 nut on each of the screws, you can normally do this by hand as they do not need to be over tightened.
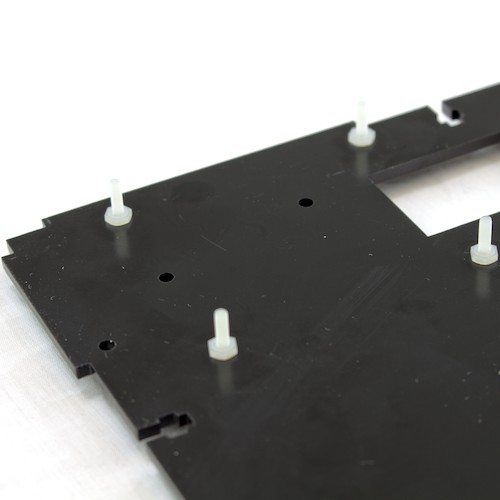
You will then want to add a second nut to each of the screws to offer extra stand off height to the Raspberry Pi, then you can carefully place your Raspberry Pi onto the mounting screws through the mounting holes and fasten it to the screws using the last of the acrylic nuts. This can be quite fiddly so we recommend taking your time and if needed use some tweezers or bottle nose pliers to gently tighten the nuts to secure the Raspberry Pi in place.
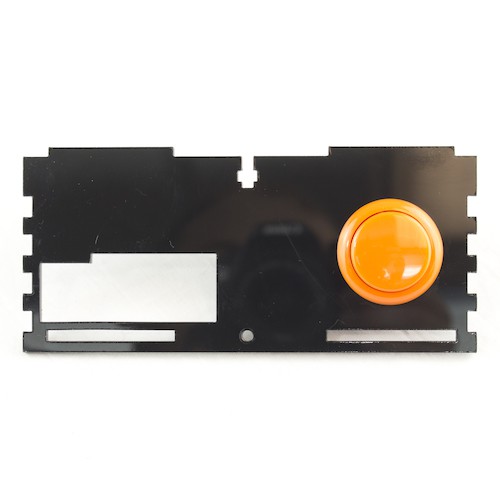
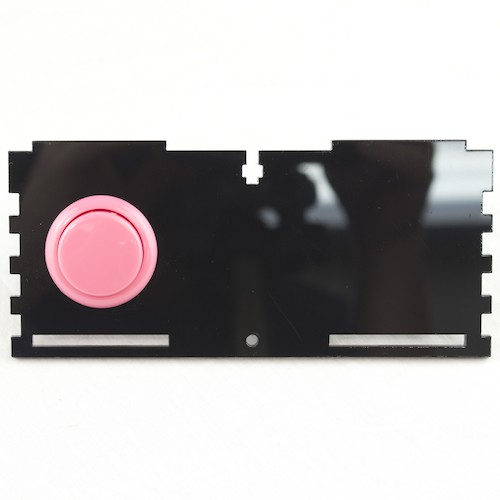
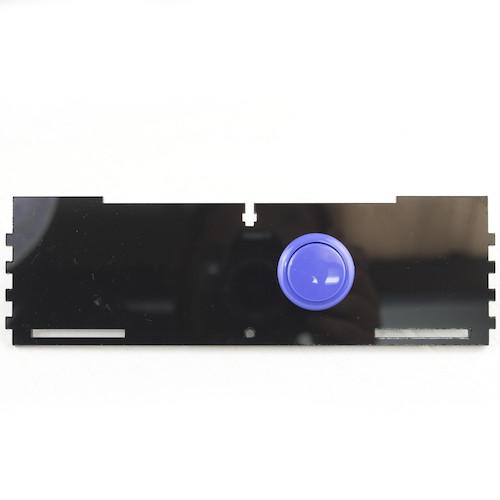
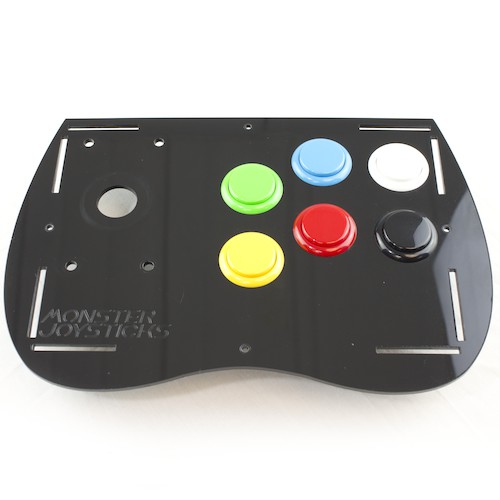
Step 2 - Populate the Panels
Now you will want to populate the side and top panels with the corresponding buttons and joystick, starting with the left panel you will want to gently insert the orange button into the hole with the square shaped access gap to the left of the hole and connecting slots at the bottom as illustrated below.
Then you will need to insert the pink button into the right panel, with the panel facing you the hole for the button should be on the left hand side and connecting slots at the bottom as illustrated below
The purple button will be inserted into the front panel, with the panel facing you the hole for the button should be on the right hand side and connecting slots at the bottom as illustrated below
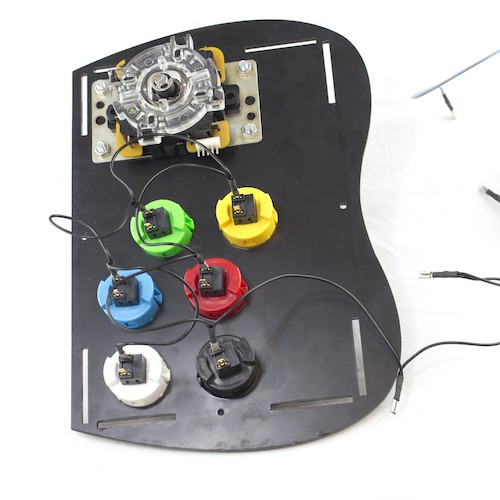
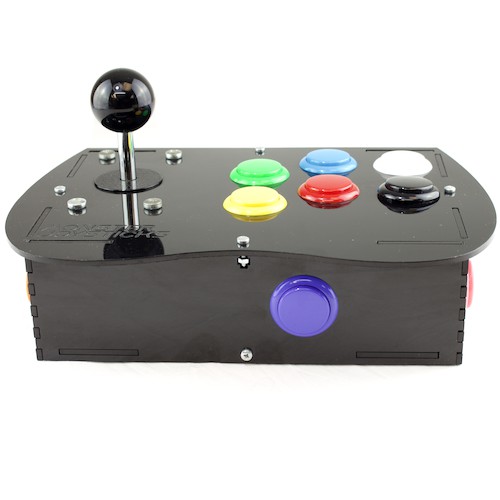
You can now populate the remaining buttons in the top panel as illustrated below, the panel should be facing you with the MonsterJoysticks logo clearly visible on the bottom left of the panel.
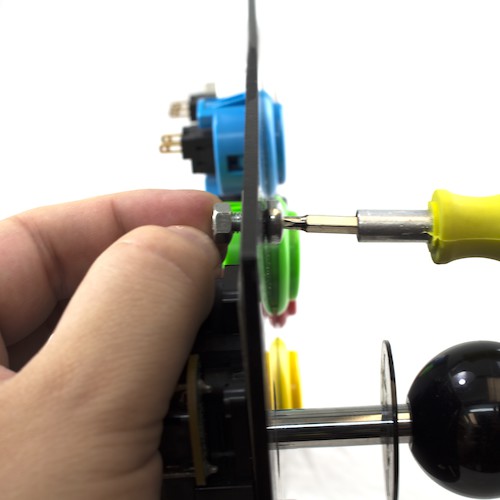
You will now want to fasten the joystick to the top panel, you will need to insert the shaft of the joystick through the mounting hole from the rear with the connector on the bottom right of the joystick. Then align the holes on the mounting plate of the joystick with the corresponding holes of the top panel, you can then proceed with fastening the two using the largest 5mm screws and nuts provided. We recommend gently fastening the opposite corners first and then when it has been loosely attached tighten the screws and nuts.
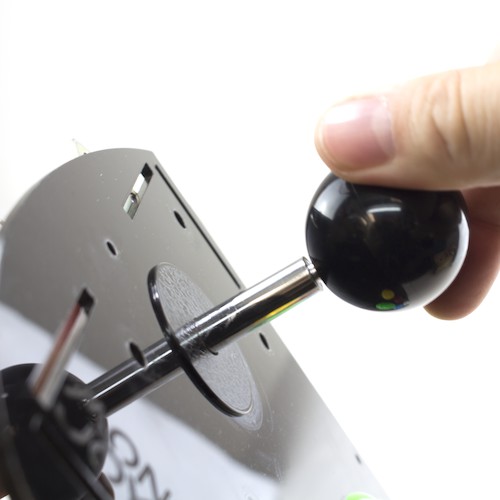
You can now add the dust cover and fasten the ball top to the joystick by screwing it on in a clockwise direction. You may need to use a pan head screwdriver to hold the base of the shaft in place to tighten the ball firmly to the top.
Step 3 - Attach Side Panels
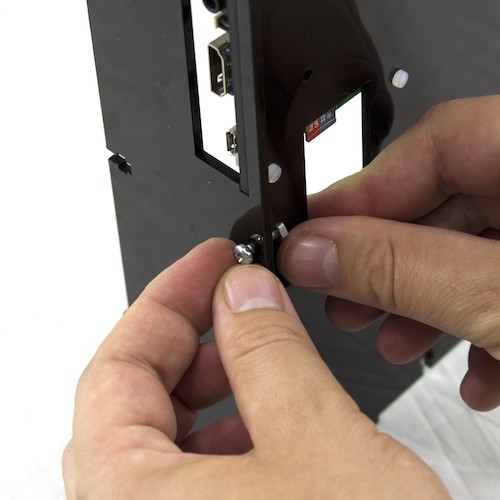
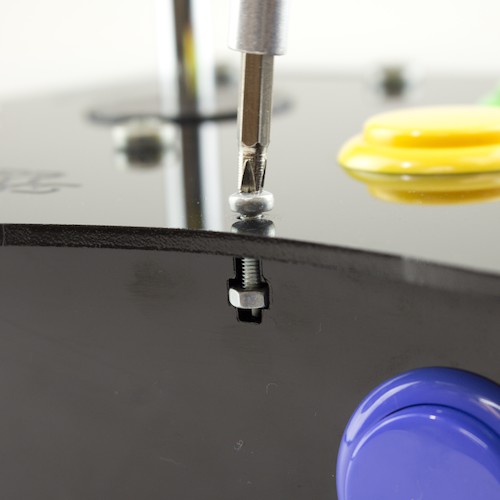
With the bottom panel orientated so the Raspberry Pi is in the top right start by attaching the rear panel. you will want to align the connecting slots on the bottom of the rear panel to those on the back of the bottom panel and the access hole for the Raspberry Pi on the left. Gently connect the panel by inserting the bottom panel into the slots on the bottom of the rear panel. Once inserted you can then fasten the back panel, you will want to place the unit on its side which should now stand freely. Start by by inserting one of the steel M3 nuts into the 't' shaped slot with the threaded hole aligned with the corresponding hole on the rear panel. With the holes aligned you will now want to insert a steel 12mm pozi pan head screw through the hole on the back panel and screw it into the M3 nut you have just inserted. once you have tightened it as much as you can with your fingers you will want to gently tighten it with a pan head screwdriver a quarter turn.
Now we can repeat the same process with the left, front and right panels, remember to make sure that the buttons are facing outwards with the connecting terminals facing into the case.
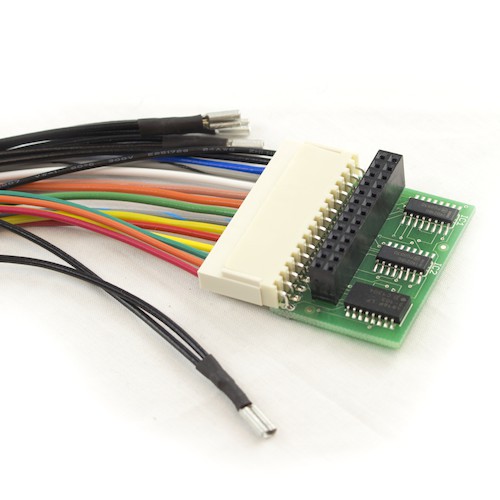
Step 4 - Attach the Wiring Loom & GPIO Interface
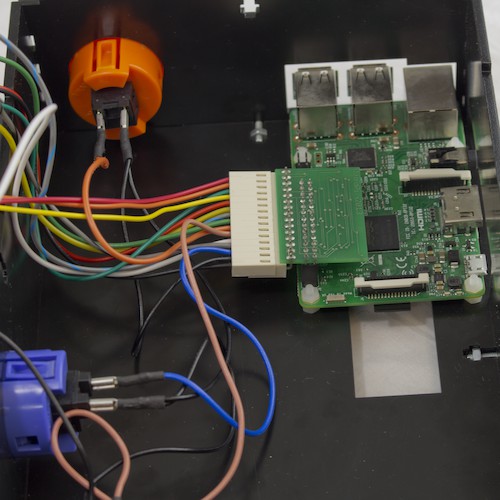
Attach the 15 pin connector to the GPIO interface, the connectors are keyed and can only be connected the correct way round, if it offering too much resistance then you may the trying to incorrectly connect it.
The easiest way to attach the wiring loom to all of the buttons is to start with the ground cable, this is the longest black cable attached to pin 14 it has a sequence of 9 female spade terminal connectors. Starting with the end connector furthest to the attached GPIO interface you will want to connect it to one of the two terminals on the buttons in the following sequence (this is not a mandatory sequence but recommended as the length between terminals has been optimised).
- White
- Blue
- Green
- Yellow
- Red
- Black
Connect the 5 pin connector to the corresponding male connector on the joystick, it connects with the fastening clip facing towards you.
You will now want to connect the corresponding wires to the empty terminals on the following buttons.
- Red Wire -> Red Button
- Yellow Wire -> Yellow Button
- Blue & Grey Wire -> Blue Button
- Green Wire -> Green Button
- White Wire -> White Button
- Black & Grey Wire -> Black Button
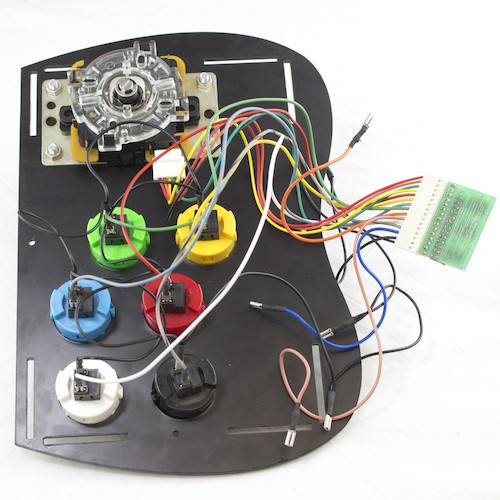
With the top panel fully wired up you will want to place it resting upside down with the flat edge facing away from the front panel of the assembled casing. Now proceed to connect the back ground wire to the remaining 3 buttons in the following order.
- Pink
- Purple
- Orange
You will now want to connect the remaining 3 wires to the empty terminals on the following buttons.
- Orange Wire -> Orange Button
- Blue Wire -> Purple Button
- Pink Wire -> Pink Button
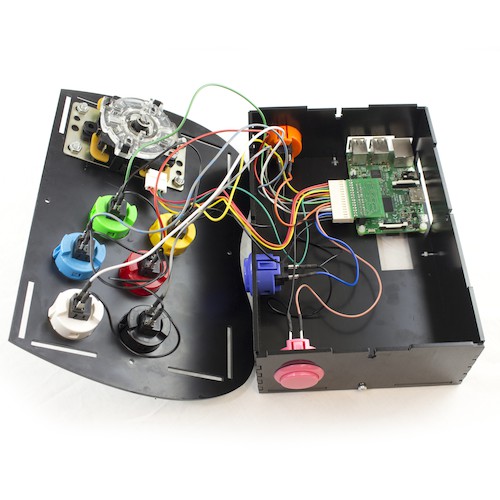
You can now insert the GIPO interface onto the Raspberry Pi GPIO, you must insert it on the first 26 pins of the GPIO on Raspberry Pi's with the 40 pin GPIO connectors.
Step 5 - Attach the Top Panel
The final step is to now attach the top panel of the MonsterJoystick, you will want to place it on top of the unit aligning the 8 slots of the side panels. While you are doing this please make sure that all wires are neatly tucked into the casing. Gently push the top panels down over the aligned slots, you can now fasten it down using the same method and fittings used on the side panels.
Congratulations, you have now assembled your MonsterJoystick, you can now proceed to setting up the software on the Raspberry Pi.